
Creating a home that is safe, comfortable, and easy to navigate is important for every stage of life. Whether you’re planning to age in place, supporting a family member with mobility needs, or simply looking to future-proof your property, accessibility is key. The good news is that through the right home accessibility renovations, you can transform your living space into one that works for everyone—without sacrificing style or comfort.
In this blog, we’ll explore practical renovation ideas that improve daily living, from barrier-free bathrooms to wider hallways and step-free entrances. We’ll also look at the benefits of universal design, budgeting tips, and how Canadians can take advantage of the Home Accessibility Tax Credit to save money. By the end, you’ll have a clear roadmap to make your home not only more accessible but also more valuable and welcoming for years to come.
Table of Contents
What Is Universal Design & Why It Matters
Step 1: Understanding Universal Design
Universal design is a building and renovation approach that makes a home usable by people of all ages and abilities. Instead of adding accessibility features later, universal design includes them from the start so that the home feels natural, safe, and convenient for everyone. For example, a barrier-free shower is not only helpful for someone using a wheelchair but also safer for children or older adults who want to avoid slips and falls.
In Canada, universal design has become more important as many homeowners plan for aging in place—staying in their homes as they grow older. By including universal design in home accessibility renovations, you create a space that adapts to life’s changes without major future construction.
Step 2: Why Universal Design Matters for Everyday Living
Accessibility is not just about meeting building codes—it’s about improving daily life. Imagine walking into your kitchen with groceries in hand and being able to reach everything easily, or moving through your home without worrying about tripping hazards. Universal design helps reduce stress and makes your home more welcoming to guests, children, and relatives with mobility challenges.
For Canadian families, this is especially valuable. Winters bring snow, ice, and bulky coats that make moving around harder. Wider hallways, lever-style door handles, and non-slip flooring all play a role in keeping your household safe and comfortable throughout the year.
Step 3: Core Principles of Universal Design
When planning home accessibility renovations, it helps to understand the core principles of universal design. These principles guide contractors, architects, and homeowners in creating spaces that are easy to use for everyone:
- Equitable Use – Design that works for people with diverse abilities (e.g., step-free entrances).
- Flexibility in Use – Features that accommodate different needs (e.g., adjustable counters or showerheads).
- Simple and Intuitive – Spaces that are easy to understand, even without special instructions (e.g., touch-free faucets).
- Perceptible Information – Clear signals for safety (e.g., good lighting on stairs, colour contrast for edges).
- Tolerance for Error – Minimizing risks (e.g., slip-resistant flooring, anti-scald faucets).
- Low Physical Effort – Features that require less force (e.g., lever handles instead of knobs).
- Size and Space for Approach and Use – Room to move comfortably, especially with mobility aids (e.g., 36-inch wide doorways).
Step 4: The Long-Term Benefits of Universal Design
Investing in universal design is not only about accessibility—it’s also a smart financial decision. Canadian homeowners often find that accessible upgrades improve resale value because the home appeals to a wider group of buyers.
Other long-term benefits include:
- Safety: Reduces accidents and injuries.
- Independence: Lets people live at home longer without relying heavily on others.
- Cost Savings: Renovating early with universal design avoids costly changes later.
- Inclusivity: Welcomes everyone—from grandparents to toddlers to visitors with disabilities.
These benefits show why universal design is not a luxury but a practical choice for modern living.
Step 5: Universal Design in Canadian Homes
In Toronto and the GTA, many older houses were built before accessibility standards were common. This means homeowners often face challenges like narrow doorways, steep steps, and small bathrooms. By planning home accessibility renovations with universal design, you can overcome these challenges and create a safer, barrier-free environment.
For instance:
- Replacing stairs with a gently sloped ramp helps both seniors and parents with strollers.
- Wider hallways allow easier movement during winter when bulky coats and boots reduce space.
- Adding grab bars in bathrooms supports mobility while blending into modern décor.
Canadian homeowners who adopt universal design often report feeling more confident about their future because their homes are ready for changing needs.
Step 6: Why You Should Care About Universal Design Now
You don’t need to wait until accessibility becomes a necessity. The best time to include universal design is during a planned renovation. Whether you’re remodeling a bathroom, updating a kitchen, or considering a full home renovation, integrating accessibility features now will save time and money later.
Most importantly, universal design gives peace of mind. It ensures that your home is ready for life’s changes, whether that means welcoming aging parents, accommodating an injury, or simply making your living space easier and safer for daily use.
Key Accessible Renovations Room by Room
When planning home accessibility renovations, it’s helpful to think about each room in your house. Every space serves a different purpose, so the upgrades should focus on comfort, safety, and ease of movement. Below, we break down the most important rooms and features to consider.
Step 1: Entrances and Hallways
The entrance sets the tone for accessibility.
- No-Step Entry: Replace stairs with a gently sloped ramp or create a step-free threshold to make it easier for wheelchairs, walkers, or strollers.
- Wider Hallways: Aim for at least 42 inches (about 107 cm) to allow smooth movement, especially in Canadian winters when people wear bulky coats.
- Smart Lighting: Motion-sensor lights ensure safe entry during dark evenings.
These upgrades help everyone, from young children to seniors, enter and exit comfortably.
Step 2: Doorways and Pathways
Narrow doorways are a common challenge in older Toronto and GTA homes.
- Widened Doorways: Expand them to at least 36 inches (91 cm) for wheelchair accessibility.
- Lever Handles: Replace round knobs with lever handles for easier grip.
- Smooth Transitions: Install flush flooring between rooms to eliminate tripping hazards.
These simple changes make everyday movement smoother for everyone.
Step 3: Accessible Kitchens
The kitchen is often the heart of the home, but it can be difficult to use without the right layout.
- Lowered Counters and Cabinets: Install countertops at varying heights and use pull-down shelving.
- Open Knee Space: Leave room under sinks and cooking areas so people using mobility devices can work comfortably.
- Easy-Access Appliances: Side-opening ovens, drawer dishwashers, and front-control stovetops make cooking safer and more practical.
- Slip-Resistant Flooring: Choose flooring that is durable and safe during spills.
These kitchen upgrades not only support accessibility but also add convenience for everyone in the family.
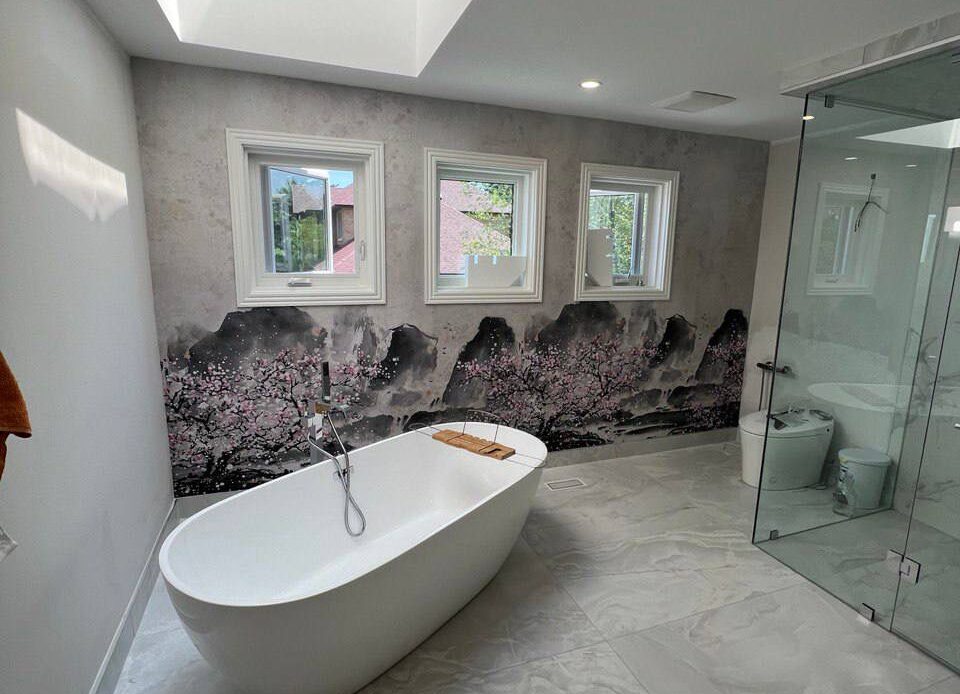
Step 4: Barrier-Free Bathrooms
Bathrooms are one of the most important spaces to include in home accessibility renovations. Slippery surfaces and tight layouts can be dangerous, so focus on safety and usability.
- Walk-In Showers: Roll-in or curbless showers allow easy access for wheelchairs and reduce tripping risks.
- Grab Bars and Supports: Securely installed grab bars near toilets, bathtubs, and showers provide safety without compromising style.
- Comfort-Height Toilets: Slightly taller toilets make sitting and standing easier for seniors and people with mobility challenges.
- Non-Slip Flooring: Use textured tiles or vinyl to minimize the chance of falls.
- Wide Doors: Outward-swinging or sliding doors make the bathroom easier to access.
With these changes, the bathroom becomes both safer and more comfortable for all.
Step 5: Multi-Story Access Solutions
For multi-level homes in the GTA, stairs can be a barrier.
- Stairlifts: A cost-effective option for those with mobility challenges.
- Home Elevators: Planning stacked closets during renovations makes it easier to add a small residential elevator later.
- Handrails: Continuous, sturdy handrails on both sides of staircases increase safety for everyone.
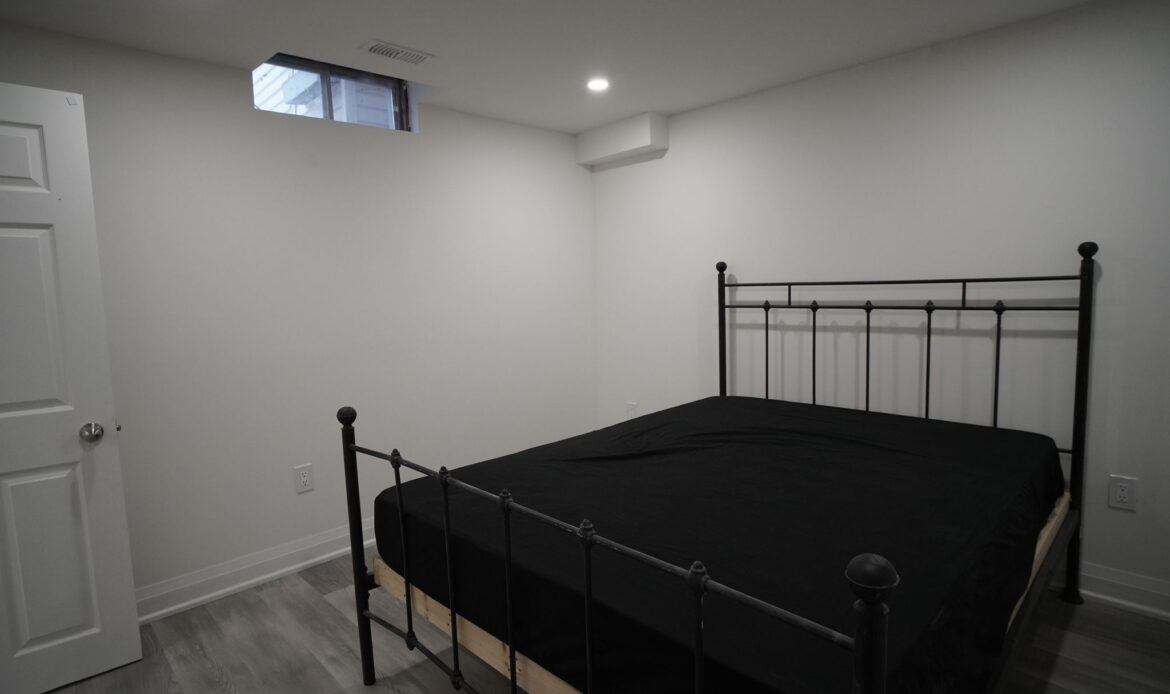
Step 6: Living Rooms and Bedrooms
Comfort is essential in areas where families spend the most time.
- Flexible Layouts: Arrange furniture to leave wide, clear pathways.
- Safe Lighting: Use dimmer switches, nightlights, and motion-activated lights to reduce accidents.
- Low-Pile Carpets or Smooth Flooring: Easier for wheelchairs or walkers to move over.
- Accessible Storage: Lower shelves, open wardrobes, and pull-out drawers make storage simple and practical.
These updates create cozy, inclusive spaces that support independence and safety.
Step 7: Outdoor Spaces
Don’t forget the exterior of your home.
- Accessible Patios and Decks: Use level flooring and wide pathways.
- Raised Garden Beds: Make gardening easier for seniors or wheelchair users.
- Slip-Resistant Surfaces: Important for Canadian winters when ice is common.
How to Leverage the Home Accessibility Tax Credit (HATC) in Ontario
The Canadian government offers valuable financial support to homeowners who invest in home accessibility renovations. One of the best options is the Home Accessibility Tax Credit (HATC), which helps cover the costs of making your home safer and more functional. Here’s a step-by-step guide to understanding and using this credit effectively.
Step 1: Understand What the HATC Is
The Home Accessibility Tax Credit (HATC) is a non-refundable tax credit designed for seniors and people with disabilities in Canada. It allows you to claim back part of the money spent on accessibility-related renovations.
- Annual Maximum: As of 2025, you can claim up to $20,000 in eligible expenses, which equals up to $3,000 in tax savings.
- Purpose: The credit supports modifications that reduce risk, improve mobility, or make a home more accessible for aging in place.
This makes the HATC a helpful tool for Toronto and GTA homeowners planning barrier-free upgrades.
Step 2: Know Who Qualifies
Not every homeowner is eligible, so it’s important to check the criteria:
- Seniors aged 65 or older at the end of the tax year.
- Individuals eligible for the Disability Tax Credit (DTC).
- Supporting relatives (such as a spouse, child, or caregiver) can also claim the credit if they cover renovation expenses for an eligible person.
If you or a family member falls into these groups, you may qualify for the HATC.
Step 3: Identify Which Renovations Qualify
Not all upgrades are covered under the program. The HATC focuses on permanent modifications that improve safety and accessibility. Common eligible expenses include:
- Installing grab bars and handrails.
- Widening doorways and hallways.
- Building a ramp or step-free entrance.
- Creating a wheelchair-accessible bathroom (walk-in showers, comfort-height toilets).
- Adding non-slip flooring to reduce fall risks.
- Installing a stairlift or residential elevator.
- Lowering counters, cabinets, or sinks for easier access.
Routine repairs, appliances, and aesthetic updates (like painting or landscaping) do not qualify.
Step 4: Understand What Costs Are Covered
Eligible expenses include:
- Materials: such as flooring, fixtures, and hardware.
- Labour Costs: paid to professional contractors, including plumbers, electricians, and carpenters.
- Building Permits and Plans: directly tied to the accessibility renovation.
Keep in mind that do-it-yourself work and furniture purchases are not covered.
Step 5: Learn How to Claim the Credit
When tax season arrives, you’ll need to report your expenses properly:
- Save All Receipts: Keep invoices from contractors and proof of payment.
- Complete CRA Form Schedule 12: This form lists your accessibility-related expenses.
- Enter on Line 31285 of Your Tax Return: This is where the HATC is officially claimed.
- Retain Documentation: The CRA may ask for proof, so keep everything organized.
By following these steps, you’ll ensure your claim is valid and maximize your return.
Step 6: Combine HATC with Other Credits
Many Canadian homeowners don’t realize they can combine the HATC with other government incentives for even more savings. For example:
- Multigenerational Home Renovation Tax Credit (MHRTC): Helps cover the cost of building a secondary suite for a senior or adult with a disability.
- Provincial Grants or Rebates: Ontario programs may offer additional support for energy-efficient or accessibility-focused upgrades.
By stacking credits, you can significantly reduce your renovation costs.
Step 7: Work With Professionals for Peace of Mind
The CRA requires renovations to be permanent and directly linked to accessibility. Working with a qualified renovation company like Ahoora Homes ensures that your upgrades not only meet the criteria but also improve your home’s long-term functionality. Professional contractors also provide detailed receipts, making the tax credit claim smoother.
Planning & Budgeting Your Accessible Renovation
Taking on home accessibility renovations requires more than just great ideas—it also needs proper planning and a realistic budget. Without the right strategy, homeowners often run into unexpected costs, delays, or design choices that don’t fully meet their needs. Careful preparation ensures your renovation improves comfort, safety, and long-term value without unnecessary stress. Here’s a step-by-step approach to help you plan effectively.
Step 1: Identify Your Needs and Priorities
The first step is understanding what accessibility features are truly necessary for your household. For example:
- Do you need a wheelchair-accessible entrance?
- Is a walk-in shower safer than a traditional tub?
- Would grab bars or non-slip flooring in the bathroom make daily life easier?
Make a list of priorities based on the mobility needs of family members, while also thinking ahead about future requirements. This will help you avoid overspending on features you don’t need right now.
Step 2: Set a Realistic Budget
Once you know your goals, determine how much you can afford to spend. In Ontario, costs for accessibility renovations can range from a few thousand dollars for small upgrades (like ramps or grab bars) to tens of thousands for larger projects (like full bathroom remodels or adding stair lifts). A realistic budget should cover:
- Materials and labour
- Permit fees
- Design consultations (if needed)
- A 10–15% contingency fund for unexpected expenses
Step 3: Explore Funding Options and Tax Credits
The good news is that there are programs in Canada to help offset the costs. The Home Accessibility Tax Credit (HATC) allows eligible homeowners to claim up to $10,000 of expenses for approved renovations. You may also qualify for provincial grants, municipal support programs, or even rebates from local utilities if your upgrades improve energy efficiency. Researching these options early can make your project more affordable.
Step 4: Work with Professionals Who Understand Accessibility
Not all contractors specialize in accessible design. Choosing the right renovation partner is crucial to avoid costly mistakes. Look for professionals with experience in:
- Barrier-free construction
- Universal design principles
- Knowledge of Ontario building codes and accessibility standards
Ask for references and review past projects to ensure they can deliver both safety and style.
Step 5: Plan the Renovation Timeline
Accessibility renovations can affect daily routines, so planning the timeline is just as important as planning the budget. For example, if your only bathroom is being remodeled, you may need temporary arrangements. A clear schedule with your contractor will help you prepare for these disruptions.
Step 6: Balance Function with Design
Many homeowners worry that accessible features will make their homes look “clinical” or unattractive. The reality is that modern accessible renovations can be both stylish and functional. Consider:
- Decorative grab bars that match your bathroom fixtures
- Low-threshold showers with sleek glass doors
- Wider doorways framed to blend seamlessly with existing interiors
This balance increases comfort while protecting your home’s resale value.
Step 7: Review and Adjust as Needed
Finally, remember that accessibility is not a one-time project—it evolves as your needs change. After your renovation is complete, review how well the upgrades are working for your family. You may find small adjustments—like additional lighting, rearranging furniture, or upgrading handles—make the space even more practical.
Conclusion
Home accessibility renovations are not just about meeting building codes—they are about creating spaces where everyone can live safely, comfortably, and independently. Whether it’s adding grab bars, widening doorways, or planning a bathroom renovation that supports aging in place, small changes can make a big difference. By applying universal design principles and taking advantage of resources like the Home Accessibility Tax Credit in Ontario, homeowners can make accessibility more affordable and achievable. With careful planning and budgeting, your accessible renovation can transform your house into a future-ready home that supports your needs today and for years to come.
FAQs About Home Accessibility Renovations in Canada
-
What qualifies as a home accessibility renovation in Canada?
Home accessibility renovations include modifications that make a home safer and more functional for seniors or individuals with mobility challenges. Examples include installing ramps, stair lifts, walk-in showers, grab bars, wider doorways, and non-slip flooring.
-
Can I claim the Home Accessibility Tax Credit (HATC) for my renovation?
Yes, if your renovation is aimed at improving accessibility for someone over 65 or an eligible person with a disability, you can claim up to $10,000 in expenses under the HATC. This applies to projects like bathroom modifications, ramps, and safety features.
-
How much does an accessible bathroom renovation cost in Ontario?
The cost of an accessible bathroom renovation in Ontario can range from $10,000 to $30,000, depending on the level of customization. Factors include materials, labour, and whether you’re adding features like walk-in tubs or barrier-free showers.
-
What is the difference between universal design and accessibility renovations?
Universal design focuses on creating spaces that everyone—regardless of age or ability—can use comfortably. Accessibility renovations, on the other hand, are targeted modifications that specifically address mobility challenges or disabilities.
-
Are there grants available for home accessibility renovations in Canada?
Yes, in addition to the HATC, Canadians may qualify for grants through programs like CMHC’s Residential Rehabilitation Assistance Program or provincial accessibility funding. These can help offset renovation costs.